
I drove through a rainbow! Yup, I really did!!
Last summer I was headed up to New York Finger Lakes area to photograph the waterfalls there and in the last couple of hours before arriving, I actually drove through a rainbow. Now, I didn’t even think that was possible. But here is how it went.
I was driving along on one of those afternoons that was bright and sunny but with lots of clouds and intermittent sprinkles and rain. You know, where you just shut off the wipers and have to start them again a minute later? Yeah, it was like that. Then I saw a rainbow up ahead, kind of near the road that was twisting and turning. And that alone was really cool. I mean, who doesn’t look at a rainbow with a bit of awe and delight? But as I traveled I realized what I was seeing was very close to the ground or the “end” of the rainbow, so to speak. Then I came around a gentle curve and there it was. AND I DROVE THROUGH THE COLORS!! Now some may say its not possible, pointing out scientific proof that you have to be at a certain angle, etc. But I know what happened that day and I count it as one of my many blessings! (no, I didn’t photograph it, I was driving!)
Rainbows are fleeting magic—one moment the sky is gray, the next it’s painted in seven vibrant hues. Yet so many photographers miss the shot because they don’t know exactly when, where, or how to point the camera. In this post, you’ll learn the insider tricks for hunting down rainbows, nailing the exposure, and turning that sudden arc of color into a share-worthy masterpiece.
The Science Behind the Shot
- Sun Angle: A rainbow appears when sunlight refracts and reflects through raindrops. The sun must be low (typically within 42° of the horizon) and behind you.
- Observer Position: Imagine a cone of light with you at the tip—stay inside that cone to see (and photograph) the arc.
Understanding this geometry means you’ll know exactly where to look—and won’t be chasing after a rainbow that’s already vanished.
Gear & Camera Settings
- Lens Choice: A wide-to-normal zoom (24–70 mm on full-frame) lets you capture the full arc plus any dramatic foreground. A telephoto (70–200 mm) can isolate a section of the rainbow against stormy clouds.
- Aperture: Aim for f/8–f/11—sharp enough for detail without losing light.
- Shutter Speed & ISO:
- If it’s bright, 1/125–1/250 s at ISO 100–200 locks in the colors.
- In darker storms, bump ISO to 400–800, but watch for noise.
- Polarizing Filter: Rotate it to deepen the sky and boost contrast—rainbow colors really pop!
- Tripod (Optional): Handy if you’re using a long lens or shooting HDR bracketed exposures.
Composition Tips
- Foreground Interest: Include a tree, building, or water reflection to anchor the rainbow in a story.
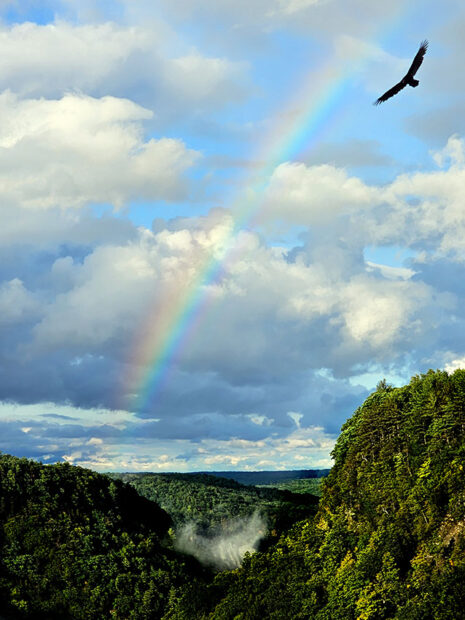
- Frame the Arc: Let the rainbow span corner-to-corner or float over your subject—experiment with placing it off-center for more dynamic shots. (I’ve rarely seen a rainbow corner to corner, but I have a few times. Most of the time it disappears into the clouds, or you are at the wrong angle to see more than a small arc.)
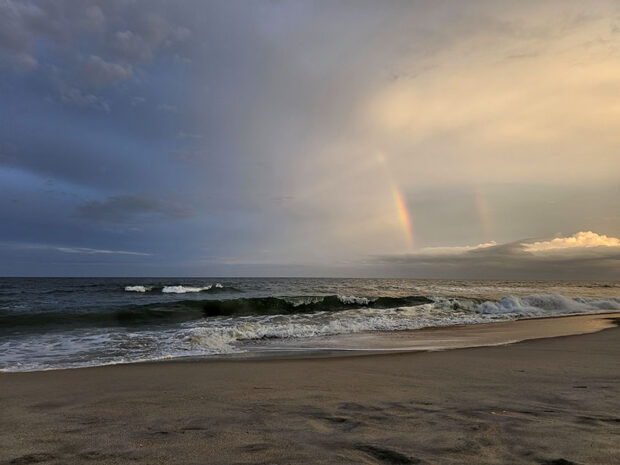
- Double Rainbows: Sometimes you’ll see a fainter secondary rainbow outside the main one. Keep an eye on your histogram—those subtle tones can get lost if you overexpose.
Need more information on photographing waves? See our post here about how to create dramatic wave images!
Common Pitfalls to Avoid
- Wrong Direction: If the sun isn’t directly behind you low in the sky, no rainbow. Always check your shadow—if it’s shorter than you, the sun’s too high.
- Overexposure: Blown highlights in clouds will kill the contrast. Use your histogram and dial in –1/3 to –2/3 EV if needed.
- Zooming Too Far: Cranking to 200 mm can squeeze out the context. Balance between arc size and storytelling.
Weekly Challenge: Rainbow Hunt
- Watch the Weather: After a rain shower when the sun peeks out, grab your camera and head outside.
- Scout the Scene: Find open sky with storm clouds in the distance and your back to the sun.
- Shoot Three Frames:
- One wide shot with foreground interest.
- One mid-range to fill the frame with the arc.
- One creative detail (close-crop on the brightest band).
- Review & Share: Compare exposures and compositions. Bonus points for posting your favorite online at our Facebook page with #RainbowHunt!
Conclusion: Embrace the Chase
Rainbows reward the prepared shooter. By knowing the sun’s angle, using the right gear, and composing with purpose, you’ll transform those sudden bursts of color into images that stop the scroll. Now get out there—and happy rainbow hunting!
Rediscover what matters through nature
Feeling Overwhelmed or craving stillness? At Finding Nature’s Beauty, we create space to breathe, reflect and reconnect –with yourself and the world around you. Reflections, our newsletter, is designed to help you find calmness and clarity from the stress of everyday living by providing weekly inspiration, stories, and actionable ideas to guide you.
