Orchids in Utah

Window Lit Orchids

Orchids in Utah

No, orchids do not grow naturally in Utah.

But my sister, who is a florist, has more than a dozen in her home and they bloom like crazy!  I took some time to photograph them indoors and stay out of the heat as well.  I love photographing flowers (Fine Art by Kathleen ) and have shown my work in many different art shows around the country.

Orchids in Light
Orchids in Light

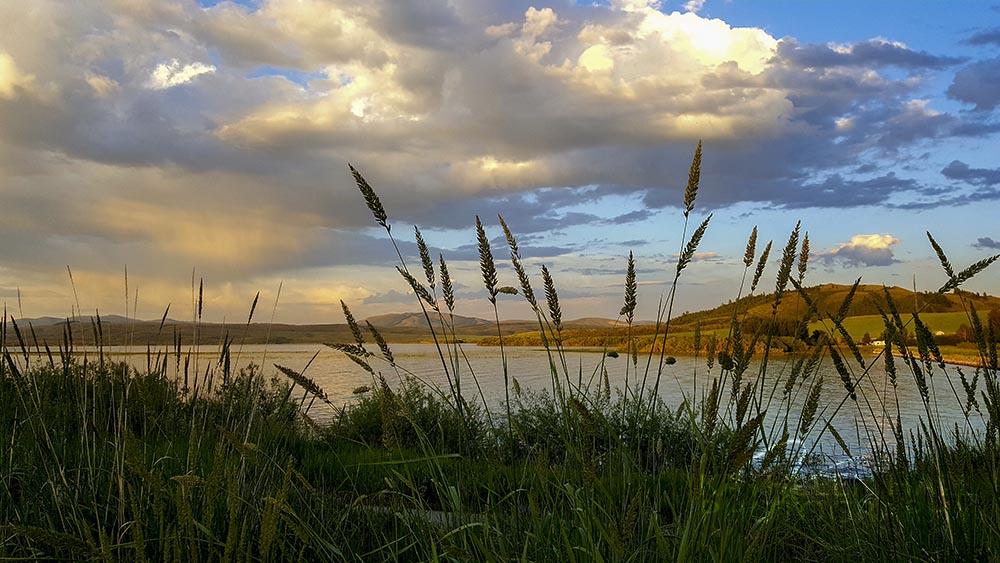
The first example is SOOC (straight out of camera) with only a few minor tweaks to color and contrast. And cropped in the square format.

I back lit the blossoms against the bright kitchen window and intentionally over exposed it.  Letting the background go white and keeping the focus tight on the blossoms.

Try this at home!

It works best with a delicate bloom with not too many petals in the flower.  Tulips and orchids are great subjects.  Roses, not so much.  They are too dense to give the delicate look this technique works best on.

Window Lit Orchids
Study in Yellow

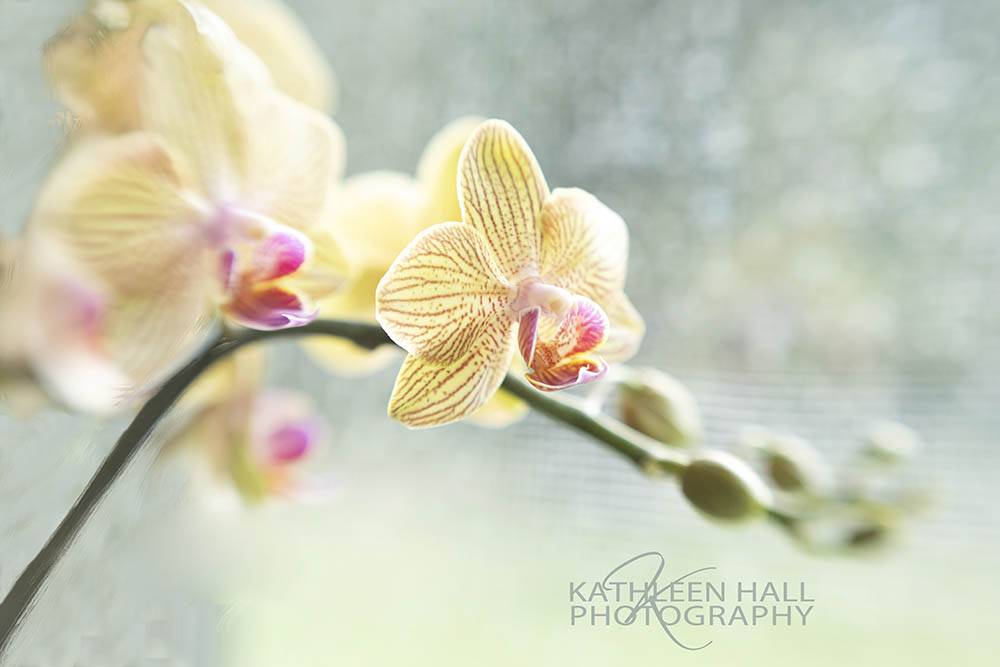
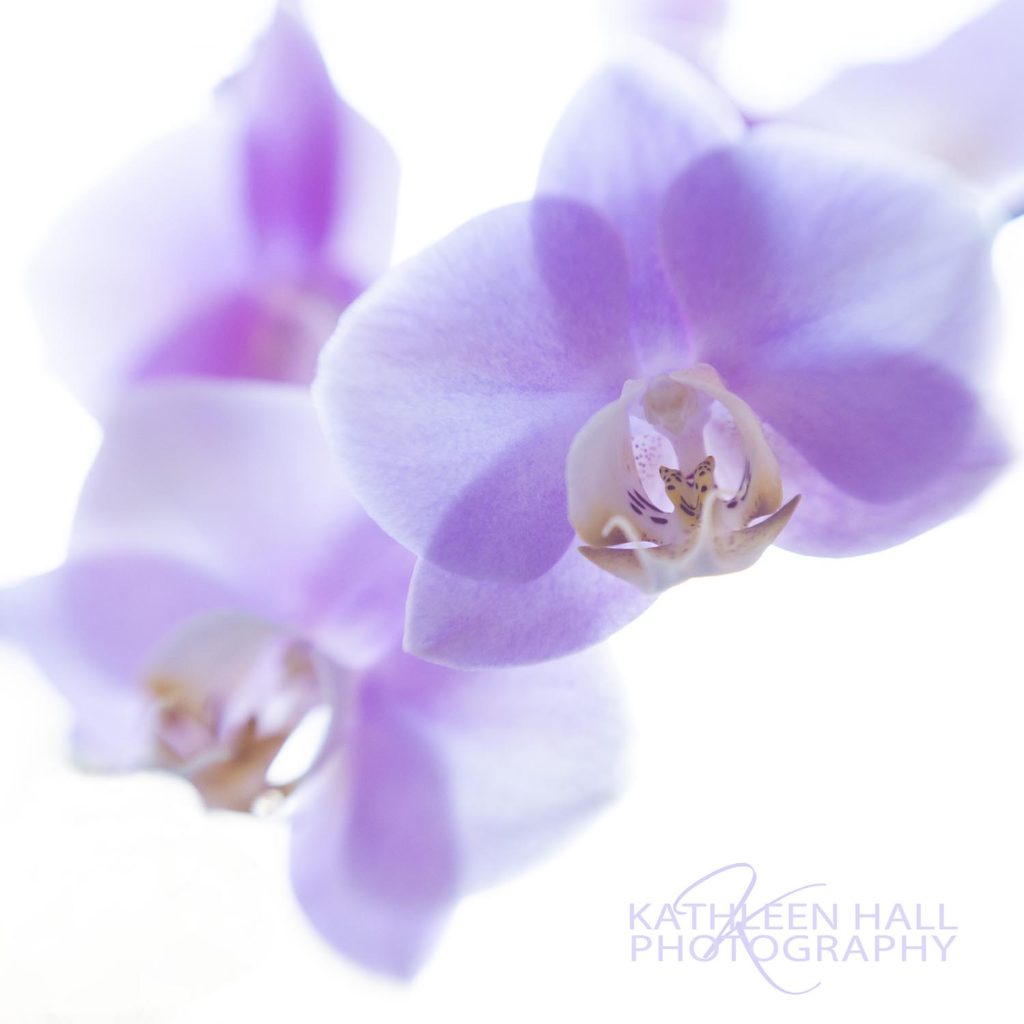
In this second image I used a similar technique .

This one I did not shoot directly into the back light, but more at an angle.  You can see the outdoors in the background, through a screen if you look closely.  The dappled background comes from using a very shallow depth of field, again focusing tight on the main bloom to get sharp focus.  In this image, I did NOT overexpose it to give that ethereal light and delicate look in the first image.

A shallow depth of field, 1.4 or 2.8 usually will give this type of look.  This image I cropped to give a stronger feel using the rule of thirds:

  • Using a tic-tac-toe type of imaginary grid, crop so that the main points of interest fall where the grid intersects.
  • Also put the main horizontal lines or the main vertical lines on one of the grid lines. This usually gives the strongest composition.

Use a shallow depth of field:

  • Either put your camera on M (manual) and dial in the exposure or, if you are too nervous to do that, just set the camera on A (aperture), choose the smallest aperture and let the camera pick the shutter speed. (The smallest aperture is the one with the lowest number, ie:  1.8, 2.0, 3.5, 4.5 or 5.6, depending on your lens.  The numbers are on the lens itself.  Just turn the ring until the lowest number lines up with the white dot on the lens.)

Sometimes the most gorgeous images are indoors! Experiment and let me see your results.

One of the REALLY nice benefits of traveling is being able to visit with family and friends more often.

Gorgeous Adventures Logo

Thanks for reading. I hope I expand your view of the world and give you a few tips for creating your own gorgeous images.

 If you would like to see more of my travels and hints for creating better travel pictures, please subscribe to this blog below.

Questions?  Feel free to comment and I will answer!

Waterfalls and falling

I Fell

3 years ago I fell.  On my maiden voyage with Smiley (that’s what I call my trailer, since when you look in the rearview mirror, the graphics show a perfect smile! )  I was setting up for one of the first times, in the dark, wet grass, wearing sandals, loose gravel, slight hill… you get the picture.

Flat on my back.  Not a bad fall, but I cracked a vertebrae.  Well the fractured vertebrae has healed, but not the REE-Dee-KUUU-LOUS… fear of falling.  That has not gone away.  Ugh.

I just want to hike and be sure of myself and go up and down these beautiful hikes, and I am unreasonably hindered by my stupid, unfounded fear of falling.  Any suggestions on how to overcome this will be MUCH appreciated!!

Still, I go onward.

Mossy Cave and Waterfall

Waterfall near Mossy Cave

I climbed a short trail to Mossy Cave and was sorely disappointed by the “cave”.  (Notice, no images of it.)  Not really a cave but just an overhang.  But, barely mentioned in the information found online is a waterfall!!! Gorgeous!!!

There were too many people to get a great artistic shot of the waterfall, but I really love this one from a distance far away.  Not many waterfalls with Bryce Canyon in the background.  This spot is outside the park on Highway 12.  It is worth a hike to see the waterfall.  Lots of people wading around in it on a hot day.

(Hint: Go UNDER the second bridge to get to the bottom of the waterfall.)


The next picture is near the Red Canyon Campground, by the National Forest Information area.  The guide wouldn’t even call it a “hike”, “because it is “just a short walk”.

Red Canyon, near Bryce Canyon

Not.

Not for this lady from the sea level altitude of Florida!! Higher altitude really changes the “walk” to a hike!  But there are a couple of benches to sit and enjoy the view and I took advantage of them. 🙂

Made it though.  It is quite beautiful and you can pick up a brochure that tells you what you are looking at by matching up the numbers on the signposts with the numbers and information on the brochure.  I love little interesting facts and was impressed by this one:

Did you know that the bark of the Ponderosa Pine smells like vanilla or butterscotch…or both   even at the same time!?  Yes, it really does! Little tidbits of information that add to my life.

Hoodoos near Red Canyon Trail

Along with the Ponderosa Pines in this image you can clearly see the “hoodoos” as the native American Indians called them.  They believed they were originally people that had turned to stone and called them “hoodoos”.  They pronounced it “hoooo…doooos” and it was said with apprehension mixed with fear.  It was their way of saying they were fearful things.  Never knew that.

Yes, we now know they are ancient rock formations that have eroded in that way.

Beautiful art in nature that has formed over millions of years.

Thanks for reading. I hope I expand your view of the world and give you a few tips for creating your own gorgeous images.

 If you would like to see more of my travels and hints for creating better travel pictures, please subscribe to this blog below.

Gorgeous Adventures Logo

Landscape Photography Tips While Camping In Idaho

After the Storm

Photographing after a tremendous rainstorm

I went through a tremendous rainstorm yesterday as I drove through Idaho.  On my way to Black Foot Reservoir, Idaho I could hardly tell what the landscape looked like until I came out from the downpour.  Then … after the storm…

After the Storm
Beautiful fields of yellow flowers after a rainstorm in Idaho

Lovely deep colors create striking photographs…

All around me were the most lovely deep colors of the landscape and then a wonderful pop of bright yellow.  In the distance were dark mountains with the shadow of the clouds still on them and the bands of gentle colors in the foreground.  Every once in awhile the bright pop of yellow interspersed the lovely blues and greens.

What a treat!!

When I was in a safe area, I stopped and created these images quickly as I was still on a road, (albeit pulled to the side).

I just love the rolling hills, the pop of yellow flowers, the ribbon of highway on the left, the mountains in shadow, and the rain streaks coming from the clouds in the distance. All of these elements are important in creating a visually appealing travel photograph.

Let’s take this image apart so that you can see why these matter in composing a stunning photograph.

The yellow pop of flowers against the shadowed mountains brings into play the color wheel and contrasts.  The two colors, the bright yellow and predominately blue, dark shadows are not only in opposition to each other on the color wheel, but also provide a great deal of contrast. This is a totally different technique than I described here, about using coordinating colors or just one dominant color in the photograph.

When you compose a photograph, look for contrasts not only in light and dark but in opposing colors on the color wheel.  If you are lucky enough to have both in the same photograph… winner!  The deep blues of the clouds in the stormy sky also stand out opposite the yellow fields.

The ribbon of the highway on the left adds interest and leads your eye to the horizon.  Remember the leading lines the art class teacher told you about in 4th grade? Yea, that applies here!

But there are even more leading lines.

The sun rays coming through the clouds end almost in the same place as the highway does and this only reinforces the pull for your eye to look here.

Did this photograph happen by accident?  No.

I walked around until I saw the lines converge.  I needed to use a high viewpoint to make sure the tiny bit of the highway was still visible and work quickly to capture the sun rays.

Once you know the rules, you can use them and strengthen just about any photograph.

Take a look at the photo below.  This was taken at the same time, about 100 yards away from the first and behind me…  Nice, clean, tells a story but not nearly as striking.

Take a little time to think about what you are photographing and walk around a bit if you are able.  You might just be surprised at the difference a little thought can make in your final images.

These are all taken near Soda Springs on the way to Black Foot Reservoir.

Fileds near Soda Springs, Idaho
Fields after a rainstorm in Idaho


The image below was taken at sunset over the reservoir.  Notice the purple clouds that are on the opposite side of the color wheel from the greens of the foliage.

Also, the visual weight of the green grasses on the left balances the weight of the dark purple clouds in the sky on the right.  Look for balance in your composition as you photograph and you will be much happier with your final images.

Moonrise over Blackfoot Reservoir
Sunset over Blackfoot Reservoir

The image below was just from a different angle and minutes before the one above.  The light is different and by shifting the grasses to the right of the image it produced a different feel.  Again, the white clouds in this image on the upper left are balanced visually by the grasses on the lower right.  Look for balance and opposing visual weight in your photographs when you compose them.

Blackfoot Reservoir, Idaho
Sunset Blackfoot Reservoir, Idaho

Camping provides so many opportunities for photography.

You are able to study the landscape and the light over a few days and plan your shots.  Weather can always disrupt those plans, but sometimes the change in weather can be a happy surprise.

Camping here was great.  The peacefulness of the campground, the lake view and the quietness of the area all lent to the wonderful feel of the campground.

I walked around the lake on the first night and was well rewarded with the full moon rising over the lake.  Just gorgeous!!

For those that like to boat, camp or fish, this is an excellent area.  Camping is peaceful with electric hookups available. The sites were larger with sufficient space between them so as to not feel crowded.

FindingNaturesBeauty-simple-landscape-photography-tips-for-awesome-travel-photos

When I look at the first photograph, I like to remember that after I go through a trial, even if it is just a rainstorm, that we are often rewarded with seeing the mundane everyday things of life in a new and fresh way.

And hopefully, we remember that they always were that gorgeous, we just couldn’t see them.


Thanks for reading. I hope I expand your view of the world and give you a few tips for creating your own gorgeous images.

 If you would like to see more of my travels and hints for creating better travel pictures, please subscribe to this blog below.

Gorgeous Adventures Logo